Flutter: Backdrop Widget- Material Design 2.0
Github Repository:
What Will I Learn?
- You learn flutter basic
- You will learn how to create backdrop widget
- You learn front and back panel
Requirements
System Requirements:
- IDEA intellij, Visual Studio Code with the Dart/Flutter Plugins, Android Studio or Xcode
- The Flutter SDK on the latest Master Build
- An Android or iOS Emulator or device for testing
OS Support for Flutter:
- Windows 7 SP1 or later (64-bit)
- mac OS (64-bit)
- Linux (64-bit)
Required Knowledge
- A little understanding of key/value stores
- A fair understanding of Mobile
development and Imperative or Object Oriented Programming - Some understanding of real time databases
Resources for Flutter and this Project:
- Flutter Website: https://flutter.io/
- Flutter Official Documentation: https://flutter.io/docs/
- Flutter Installation Information: https://flutter.io/get-started/install/
- Flutter GitHub repository: https://github.com/flutter/flutter
- Flutter Dart 2 Preview Information: https://github.com/flutter/flutter/wiki/Trying-the-preview-of-Dart-2-in-Flutter
- Flutter Technical Overview: https://flutter.io/technical-overview/
- Dart Website: https://www.dartlang.org/
Difficulty
- Basic
What is Flutter?
Flutter is an SDK owned by Google to create applications for Android and iOS using a single codebase. Flutter uses the Dart programming language (also owned by Google). Flutter was in beta when I released this video, so things might still change a bit. But the SDK is already mature enough to write some cool production apps!
Flutter has one of the simplest and effortless establishment forms. You basically clone the GitHub repo and keep running there Flutter Doctor apparatus, it is a breeze. For more data on the most proficient method to introduce Flutter for your framework see: https://flutter.io/setup/
In this tutorial I will explain how to make a backdrop widget with aa front and back panel.
Getting started
I acquaint how with actualize simple Backdrop of material design with flutter. I allude to Flutter's exhibition app for the numerous parts.
All Code for this Tutorial:
Make a Base
To begin with, make a base. Characterize movement controller to control animations. value:1.0 represents the underlying state. Default is 0.0 on the off chance that you don't indicate anything, yet I need to open the board in the underlying state, so set to 1.0.
     class _BackdropPageState extends State<BackdropPage>                                              with SingleTickerProviderStateMixin {

 AnimationController controller;


      @override

 void initState() {

    // TODO: implement initState

   super.initState();

   controller = new AnimationController(

       vsync: this, duration: new
Duration(milliseconds: 100), value: 1.0);

  }
Keep in mind discard AnimationController.
      @override

void dispose() {

  // TODO: implement dispose

  super.dispose();

  controller.dispose();

}
Change AnimatedIcon
Next, make a format. This progression, simply put an AnimatedIcon. In Backdrop, AppBar's height isn't fundamental, so set to 0.0. Liveliness of board and movement of symbol are synchronized by passing _controller.view to the advance of AnimatedIcon.
@override

 Widget build(BuildContext context) {

  return new Scaffold(

    appBar: new AppBar(

      title: new Text("Backdrop"),

      elevation: 0.0,

      leading: new IconButton(

        onPressed: () {

        controller.fling(velocity: isPanelVisible ?
-1.0 : 1.0);

       },

      icon: new AnimatedIcon(

        icon: AnimatedIcons.close_menu,

        progress: controller.view,

      ),

    ),

   ),

   body: new TwoPanels(

    controller: controller,

       ),

      );

   }

  }
bool get isPanelVisible {

    final AnimationStatus status =
     controller.status;

return status == AnimationStatus.completed ||

    status == AnimationStatus.forward;

}
Furthermore, activity will execute when button press.
     leading: new IconButton(

       onPressed: () {

        controller.fling(velocity: isPanelVisible ?
   -1.0 : 1.0);

        },
Assemble this, you can check movement of AnimatedIcon-
Make a Backdrop Layout
This progression, make a Backdrop's design. Characterized a following capacity. For the board, corners are adjusted by the material outline rule's case.
    Animation<RelativeRect>
     getPanelAnimation(BoxConstraints
  constraints) {

  final height = constraints.biggest.height;

final backPanelHeight = height -
      header_height;

    final frontPanelHeight = -header_height;


     return new RelativeRectTween(

        begin: new RelativeRect.fromLTRB(

            0.0, backPanelHeight, 0.0,
  frontPanelHeight),

        end: new RelativeRect.fromLTRB(0.0, 0.0,
    0.0, 0.0))

    .animate(new CurvedAnimation(

        parent: widget.controller, curve:
    Curves.linear));

    }


    Widget bothPanels(BuildContext context,
    BoxConstraints constraints) {

   final ThemeData theme = Theme.
  of(context);


   return new Container(

   child: new Stack(

     children: <Widget>[

      new Container(

        color: theme.primaryColor,

        child: new Center(

          child: new Text(

            "Back Panel",

            style: new TextStyle(fontSize: 24.0, color:
        Colors.white),

          ),

        ),

      ),

      new PositionedTransition(

        rect: getPanelAnimation(constraints),

        child: new Material(

          elevation: 12.0,

          borderRadius: new BorderRadius.only(

              topLeft: new Radius.circular(16.0),

              topRight: new Radius.circular(16.0)),

          child: new Column(

            children: <Widget>[

              new Container(

                height: header_height,

                child: new Center(

                  child: new Text(

                    "Shop Here",

                    style:
     Theme.of(context).textTheme.button,

                  ),

                ),

              ),

              new Expanded(

                child: new Center(

                  child: new Text("Front Panel",

                      style: new TextStyle(

                          fontSize: 24.0, color:
      Colors.black)),

                  ),

                )

              ],

            ),

          ),

        )

      ],

    ),

   );

    }
Pass this format to LayoutBuilder.
   @override

  Widget build(BuildContext context) {

    return new LayoutBuilder(

     builder: bothPanels,

     );

   }

   }
Board does not move now. How about we go to next
Make Animation
This progression is last. To begin with, characterized the liveliness of the board. Make Animation to go to PositionedTransition. The tallness of the header is subtracted from stature since show the header with the board close.
   Animation<RelativeRect>
    getPanelAnimation(BoxConstraints
constraints) {

final height = constraints.biggest.height;

final backPanelHeight = height -
    header_height;

final frontPanelHeight = -header_height;


   return new RelativeRectTween(

        begin: new RelativeRect.fromLTRB(

            0.0, backPanelHeight, 0.0,
         frontPanelHeight),

        end: new RelativeRect.fromLTRB(0.0, 0.0,
0.0, 0.0))

    .animate(new CurvedAnimation(

        parent: widget.controller, curve:
Curves.linear));

 }
Characterize board as an offspring of PositionedTransition since I need to energize the board when IconButton is squeezed. PositionedTransition advances the kid's situation from begin to end and energizes as indicated by the passed Animation. The accompanying parts
   final ThemeData theme = Theme.of(context);


return new Container(

  child: new Stack(

    children: <Widget>[

      new Container(

        color: theme.primaryColor,

        child: new Center(

          child: new Text(

            "Back Panel",

            style: new TextStyle(fontSize: 24.0, color:
  Colors.white),

          ),

        ),

      ),

      new PositionedTransition(

        rect: getPanelAnimation(constraints),

        child: new Material(
Rework this way.
 Animation<RelativeRect>

new Container(

    child: new Stack(

      children: <Widget>[

      new Container(

        color: theme.primaryColor,

        child: new Center(

          child: new Text(

            "Back Panel",

            style: new TextStyle(fontSize: 24.0, color:
   Colors.white),

          ),

        ),

      ),

      new PositionedTransition(

        rect: getPanelAnimation(constraints),

        child: new Material(=
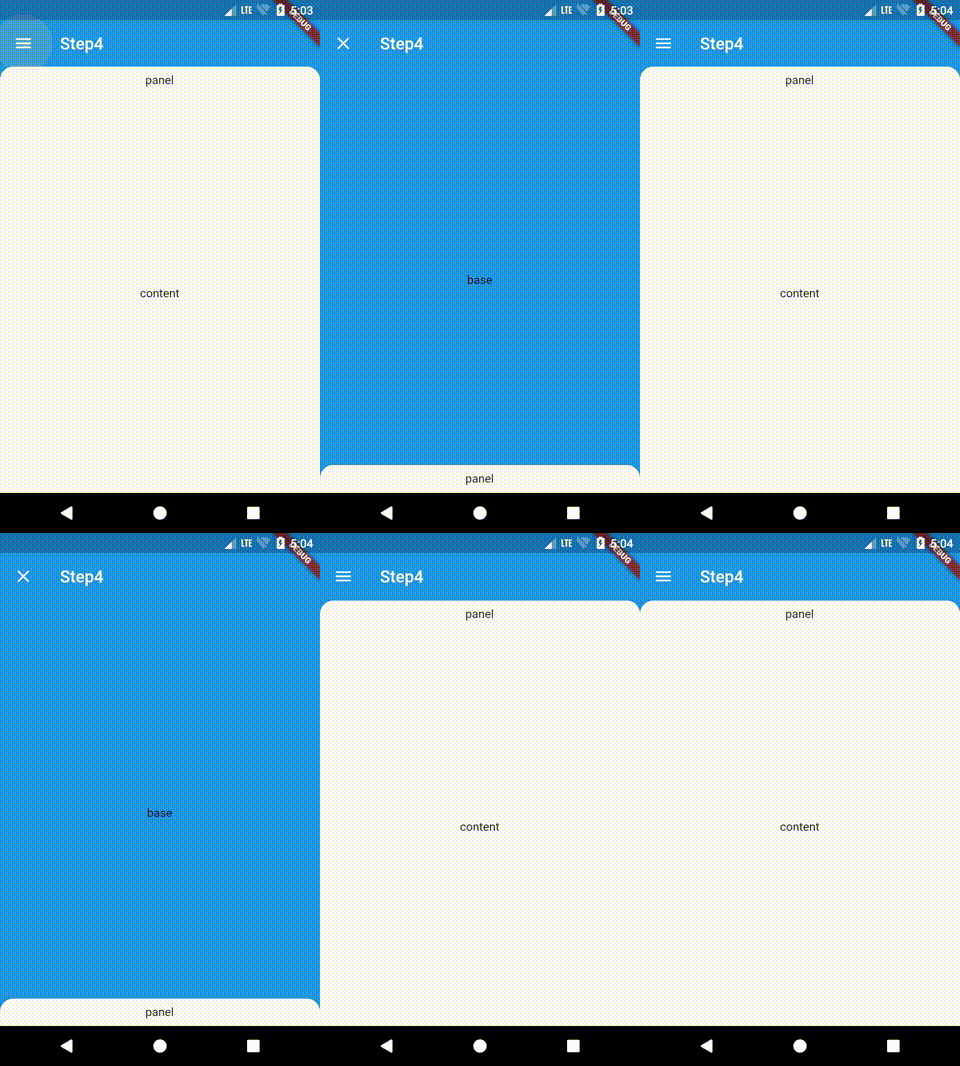
I have done my work. After completing the work You get a backdrop look like this-
This code is in the accompanying archive.
Summary
In this tutorial I explained how to make a backdrop widget with aa front and back panel.

