Creating MVC based BookStore Application in Symfony Framework
What Will I Learn?
how to create a complete MVC based BookStore Application in Symfony Framework.
Requirements
PHP built-in development web server (Multi-platform)
Operating System: Cross-platform
UNIX/Linux based OS
Apache2 server with PHP7 installed
MySQL database
Browser Support: IE (Internet Explorer 8+), Firefox, Google Chrome, Safari, Opera
PHP Compatibility: PHP 5.4 or later. To get the maximum benefit, use the latest version.
Difficulty
- Intermediate
Tutorial contents
In this tutorial, we will figure out how to make a total MVC based BookStore Application in Symfony Framework. Here is the 18 steps in the following which we will used in creation.
Step 1: Project creation
first of all we will create a new project named “BookStore” in Symfony using the following command.
symfony new BookStore code
Step 2: Controller and Route creation
Create a BooksController in “src/AppBundle/Controller” directory. It is defined as follows.
BooksController.php
<?php
namespace AppBundle\Controller;

use Sensio\Bundle\FrameworkExtraBundle\Configuration\Route;
use Symfony\Bundle\FrameworkBundle\Controller\Controller;
use Symfony\Component\HttpFoundation\Response;

class BooksController {
   /**
      * @Route("/books/author")
   */
   public function authorAction() {
      return new Response('Book store application!');
   }
}
Now, we have made a BooksController, next make a view to render the activity.
Step 3: Create a View
How about we make another envelope named "Books" in "application/Resources/sees/" index. Inside the envelope, make a document "author.html.twig" and include the following changes.
author.html.twig
<h3> Simple book store application</h3>
Now, render the view in BooksController class. It is defined as follows.
BooksController.php
<?php
namespace AppBundle\Controller;

use Sensio\Bundle\FrameworkExtraBundle\Configuration\Route;
use Symfony\Bundle\FrameworkBundle\Controller\Controller;
use Symfony\Component\HttpFoundation\Response;

class BooksController extends Controller {
   /**
      * @Route("/books/author")
   */
   public function authorAction() {
      return $this->render('books/author.html.twig');
   }
}
Starting at now, we have made a fundamental BooksController and the outcome is rendered. You can check the outcome in the program utilizing the URL "http://localhost:8000/books/author".ges.
Step 4: Database Configuration
Configure the database in “app/config/parameters.yml” file.
Open the file and add the following changes.
parameter.yml
# This file is auto-generated during the composer install
parameters:
   database_driver: pdo_mysql
   database_host: localhost
   database_port: 3306
   database_name: booksdb
   database_user: <database_username>
   database_password: <database_password>
   mailer_transport: smtp
   mailer_host: 127.0.0.1
   mailer_user: null
   mailer_password: null
   secret: 0ad4b6d0676f446900a4cb11d96cf0502029620d

   doctrine:
      dbal:
      driver:   pdo_mysql
      host:     '%database_host%'
      dbname:   '%database_name%'
      user:     '%database_user%'
      password: '%database_password%'
      charset: utf8mb4
Now, Doctrine can connect to your database “booksdb”.
Step 5: Create a Database
Issue the following command to generate “booksdb” database. This step is used to bind the database in Doctrine.
php bin/console doctrine:database:create
In the wake of executing the command, it consequently produces an exhaust "booksdb" database. You can see the following reaction on your screen.
It will produce the following result −
Created database `booksdb` for connection named default
Step 6: Mapping Information
Create a Book entity class inside the Entity directory which is located at “src/AppBundle/Entity”.
You can directly pass Book class using annotations. It is defined as follows.
Book.php
Add the following code in the file.
<?php
namespace AppBundle\Entity;
use Doctrine\ORM\Mapping as ORM;

/**
   * @ORM\Entity
   * @ORM\Table(name = "Books")
*/
class Book {
   /**
      * @ORM\Column(type = "integer")
      * @ORM\Id
      * @ORM\GeneratedValue(strategy = "AUTO")
   */
   private $id;

   /**
      * @ORM\Column(type = "string", length = 50)
   */
   private $name;

   /**
      * @ORM\Column(type = "string", length = 50)
   */

   private $author;
   /**
      * @ORM\Column(type = "decimal", scale = 2)
   */
   private $price;
}
Here, the table name is optional.
On the off chance that the table name isn't indicated, at that point it will be resolved consequently in light of the name of the element class.
Step 7: Bind an Entity
Doctrine creates simple entity classes for you. It helps you build any entity.
Issue the following command to generate an entity.
php bin/console doctrine:generate:entities AppBundle/Entity/Book
Then you will see the following result and the entity will be updated.
Generating entity "AppBundle\Entity\Book”
   > backing up Book.php to Book.php~
   > generating AppBundle\Entity\Book
Book.php
<?php
namespace AppBundle\Entity;

use Doctrine\ORM\Mapping as ORM;
/**
   * @ORM\Entity
   * @ORM\Table(name = "Books")
*/
class Book {
   /**
      * @ORM\Column(type = "integer")
      * @ORM\Id
      * @ORM\GeneratedValue(strategy = "AUTO")
   */
   private $id;

   /**
      * @ORM\Column(type = "string", length = 50)
   */
   private $name;

   /**
      * @ORM\Column(type = "string", length = 50)
   */
   private $author;

   /**
      * @ORM\Column(type = "decimal", scale = 2)
   */
   private $price;

   /**
      * Get id
      *
      * @return integer
   */
   public function getId() {
      return $this->id;
   }

   /**
      * Set name
      *
      * @param string $name
      *
      * @return Book
   */
   public function setName($name) {
      $this->name = $name;
      return $this;
   }

   /**
      * Get name
      *
      * @return string
   */
   public function getName() {
      return $this->name;
   }

   /**
      * Set author
      *
      * @param string $author
      *
      * @return Book
   */
   public function setAuthor($author) {
      $this->author = $author;
      return $this;
   }

   /**
      * Get author
      *
      * @return string
   */
   public function getAuthor() {
      return $this->author;
   }

   /**
      * Set price
      *
      * @param string $price
      *
      * @return Book
   */
   public function setPrice($price) {
      $this->price = $price;
      return $this;
   }

   /**
      * Get price
      *
      * @return string
   */
   public function getPrice() {
      return $this->price;
   }
}
Step 8: Mapping Validation
Subsequent to making elements, you ought to approve the mappings utilizing the following charge.
php bin/console doctrine:schema:validate
It will produce the following result −
[Mapping]  OK - The mapping files are correct
[Database] FAIL - The database schema is not in sync with the current mapping file.
Since we have not made the Books table, the element is out of adjust. Give us a chance to make the Books table utilizing Symfony order in the subsequent stage.
Step 9: Creating Schema
Teaching can consequently make all the database tables required for Book substance. This should be possible utilizing the accompanying charge.
php bin/console doctrine:schema:update --force
After executing the command, you will see the following response.
Updating database schema...
Database schema updated successfully! "1" query was executed
Now, again validate the schema using the following command.
php bin/console doctrine:schema:validate
It will produce the following result −
[Mapping]  OK - The mapping files are correct.
[Database] OK - The database schema is in sync with the mapping files.
Step 10: Getter and Setter
As found in the Bind an Entity area, the following summon produces all the getters and setters for the Book class.
$ php bin/console doctrine:generate:entities AppBundle/Entity/Book
Step 11: Fetching Objects from the Database
Create a method in BooksController that will display the books’ details.
BooksController.php
/**
   * @Route("/books/display", name="app_book_display")
*/
public function displayAction() {
   $bk = $this->getDoctrine()
   ->getRepository('AppBundle:Book')
   ->findAll();
   return $this->render('books/display.html.twig', array('data' => $bk));
}
Step 12: Create a View
We should make a view that focuses to show activity. Move to the perspectives index and make record "display.html.twig". Include the accompanying changes in the document.
display.html.twig
{% extends 'base.html.twig' %}
{% block stylesheets %}
<style>
.table { border-collapse: collapse; }
.table th, td {
border-bottom: 1px solid #ddd;
width: 250px;
text-align: left;
align: left;
}
</style>
{% endblock %}
{% block body %}
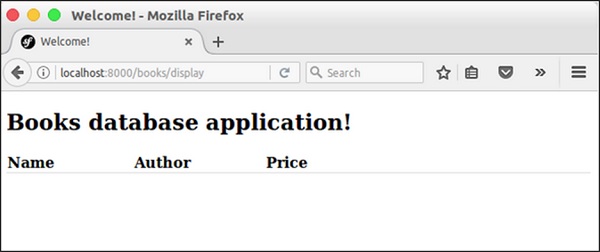
<h2>Books database application!</h2>
<table class = "table">
<tr>
<th>Name</th>
<th>Author</th>
<th>Price</th>
</tr>
{% for x in data %}
<tr>
<td>{{ x.Name }}</td>
<td>{{ x.Author }}</td>
<td>{{ x.Price }}</td>
</tr>
{% endfor %}
</table>
{% endblock %}
You can obtain the result by requesting the URL “http://localhost:8000/books/display” in the browser.
Result
Step 13: Add a Book Form
How about we make a usefulness to include a book into the framework. Make another page, newAction technique in the BooksController as takes after.
// use section
use Symfony\Component\HttpFoundation\Request;
use Symfony\Component\Form\Extension\Core\Type\TextType;
use Symfony\Component\Form\Extension\Core\Type\SubmitType;

// methods section
/**
   * @Route("/books/new")
*/

public function newAction(Request $request) {
   $stud = new StudentForm();
      $form = $this->createFormBuilder($stud)
         ->add('name', TextType::class)
         ->add('author', TextType::class)
         ->add('price', TextType::class)
         ->add('save', SubmitType::class, array('label' => 'Submit'))
         ->getForm();
   return $this->render('books/new.html.twig', array('form' => $form->createView(),));
}
Step 14: Create a View For Book Form
We should make a view that focuses to another activity. Move to the perspectives catalog and make a record "new.html.twig". Include the accompanying changes in the record.
{% extends 'base.html.twig' %}
{% block stylesheets %}
   <style>
      #simpleform {
         width:600px;
         border:2px solid grey;
         padding:14px;
      }
      #simpleform label {
         font-size:14px;
         float:left;
         width:300px;
         text-align:right;
         display:block;
      }
      #simpleform span {
         font-size:11px;
         color:grey;
         width:100px;
         text-align:right;
         display:block;
      }
      #simpleform input {
         border:1px solid grey;
         font-family:verdana;
         font-size:14px;
         color:light blue;
         height:24px;
         width:250px;
         margin: 0 0 10px 10px;
      }
      #simpleform textarea {
         border:1px solid grey;
         font-family:verdana;
         font-size:14px;
         color:light blue;
         height:120px;
         width:250px;
         margin: 0 0 20px 10px;
      }
      #simpleform select {
         margin: 0 0 20px 10px;
      }
      #simpleform button {
         clear:both;
         margin-left:250px;
         background: grey;
         color:#FFFFFF;
         border:solid 1px #666666;
         font-size:16px;
      }
   </style>
{% endblock %}
{% block body %}
   <h3>Book details:</h3>
   <div id = "simpleform">
      {{ form_start(form) }}
      {{ form_widget(form) }}
      {{ form_end(form) }}
   </div>
{% endblock %}
It will produce the following screen as output −

Step 15: Collect Book Information and Store It
We should change the newAction technique and incorporate the code to deal with shape accommodation. Additionally, store the book data into the database.
/**
   * @Route("/books/new", name="app_book_new")
*/
public function newAction(Request $request) {
   $book = new Book();
   $form = $this->createFormBuilder($book)
      ->add('name', TextType::class)
      ->add('author', TextType::class)
      ->add('price', TextType::class)
      ->add('save', SubmitType::class, array('label' => 'Submit'))
      ->getForm();

   $form->handleRequest($request);

   if ($form->isSubmitted() && $form->isValid()) {
      $book = $form->getData();
      $doct = $this->getDoctrine()->getManager();

      // tells Doctrine you want to save the Product
      $doct->persist($book);

      //executes the queries (i.e. the INSERT query)
      $doct->flush();

      return $this->redirectToRoute('app_book_display');
   } else {
      return $this->render('books/new.html.twig', array(
         'form' => $form->createView(),
      ));
   }
}
Once the book is stored into the database, redirect to the book display page.
Step 16: Updating the Book
To update the book, create an action, updateAction, and add the following changes.
/**
   * @Route("/books/update/{id}", name = "app_book_update" )
*/
public function updateAction($id, Request $request) {
   $doct = $this->getDoctrine()->getManager();
   $bk = $doct->getRepository('AppBundle:Book')->find($id);

   if (!$bk) {
      throw $this->createNotFoundException(
         'No book found for id '.$id
      );
   }
   $form = $this->createFormBuilder($bk)
      ->add('name', TextType::class)
      ->add('author', TextType::class)
      ->add('price', TextType::class)
      ->add('save', SubmitType::class, array('label' => 'Submit'))
      ->getForm();

   $form->handleRequest($request);

   if ($form->isSubmitted() && $form->isValid()) {
      $book = $form->getData();
      $doct = $this->getDoctrine()->getManager();

      // tells Doctrine you want to save the Product
      $doct->persist($book);

      //executes the queries (i.e. the INSERT query)
      $doct->flush();
      return $this->redirectToRoute('app_book_display');
   } else {
      return $this->render('books/new.html.twig', array(
         'form' => $form->createView(),
      ));
   }
}
Here, we are handling two functionalities. On the off chance that the demand just contains id, at that point we bring it from the database and show it in the book shape. What's more, if the demand contains full book data, at that point we refresh the subtle elements in the database and divert to the book show page.e.
Step 17: Deleting an Object
Deleting an object requires a call to the remove() method of the entity (doctrine) manager.
This can be done using the following code.
/**
   * @Route("/books/delete/{id}", name="app_book_delete")
*/
public function deleteAction($id) {
   $doct = $this->getDoctrine()->getManager();
   $bk = $doct->getRepository('AppBundle:Book')->find($id);

   if (!$bk) {
      throw $this->createNotFoundException('No book found for id '.$id);
   }
   $doct->remove($bk);
   $doct->flush();
   return $this->redirectToRoute('app_book_display');
}
Here, we deleted the book and redirected to book display page.
Step 18: Include Add / Edit / Delete Functionality in Display Page
Now, update the body block in display view and include include add / edit / delete links as follows.
{% block body %}
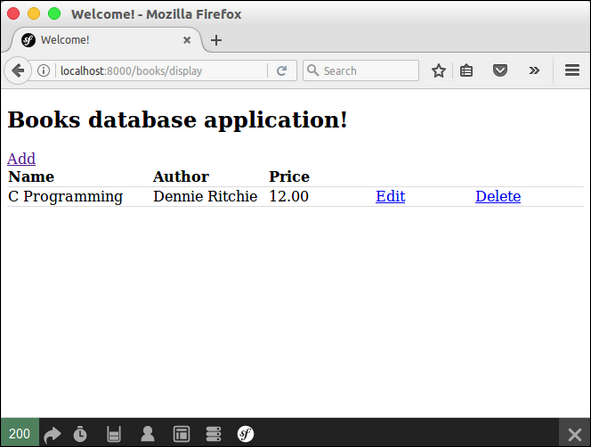
<h2>Books database application!</h2>
<div>
<a href = "{{ path('app_book_new') }}">Add</a>
</div>
<table class = "table">
<tr>
<th>Name</th>
<th>Author</th>
<th>Price</th>
<th></th>
<th></th>
</tr>
{% for x in data %}
<tr>
<td>{{ x.Name }}</td>
<td>{{ x.Author }}</td>
<td>{{ x.Price }}</td>
<td><a href = "{{ path('app_book_update', { 'id' : x.Id }) }}">Edit</a></td>
<td><a href = "{{ path('app_book_delete', { 'id' : x.Id }) }}">Delete</a></td>
</tr>
{% endfor %}
</table>
{% endblock %}
It will produce the following screen as output −
Symfony contains an arrangement of PHP segments, an application structure, a group and a reasoning. Symfony is greatly adaptable and equipped for meeting every one of the prerequisites of cutting edge clients, experts, and a perfect decision for every one of the learners with PHP.
Curriculum
It's my first contribution in this tutorial.
Posted on Utopian.io - Rewarding Open Source Contributors
Your contribution cannot be approved because it does not follow the Utopian Rules, and is considered as plagiarism. Plagiarism is not allowed on Utopian, and posts that engage in plagiarism will be flagged and hidden forever.
You can contact us on Discord.
[utopian-moderator]
Hey @fuzeh, I just gave you a tip for your hard work on moderation. Upvote this comment to support the utopian moderators and increase your future rewards!
Congratulations @imshoaib! You received a personal award!
Click here to view your Board
Do not miss the last post from @steemitboard:
Congratulations @imshoaib! You received a personal award!
You can view your badges on your Steem Board and compare to others on the Steem Ranking
Vote for @Steemitboard as a witness to get one more award and increased upvotes!