Build social media platform with the Steem Blockchain #2 — Posting a comment to the Blockchain

Carrying on from part 1, we will create a simple form that posts to the Steem blockchain using Vue.js, and Steem.js. The full code up to this article is available here.
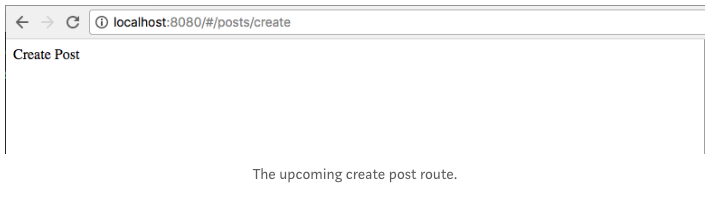
By the end of the part we will build this:
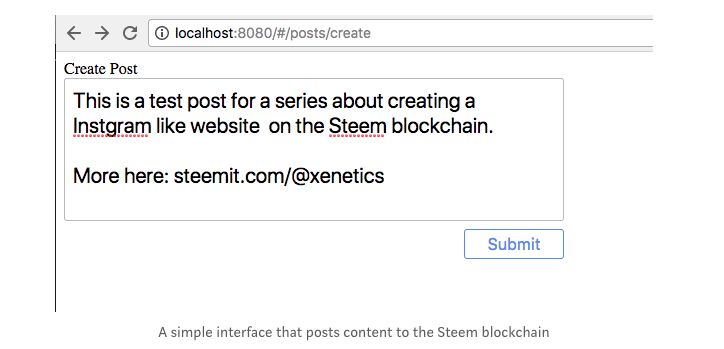
It looks simple, but we will be writing tests, using Storybook.js to design the interface, and container-layout-component architecture to make sure everything is decoupled. This will lay the path for a full social media platform, similar to Instagram, with images, tags, following, and so on.
Creating the route component and the first test
First, let’s create new page in the views folder by running:
mkdir src/views/posts then vc src/views/posts/Create -t .
The -t flag creates a test for us — we will be writing tests for our components from now on. vc is the command for vue-component-scaffolder, a npm module I made to quickly generate a new component templates and the associated test. You can install it from the link above, or refer to the Github project for this article if you want to type <template>, <script> and <scope> manually.
Before going any further, make a change to package.json, specifically unit under scripts.
"unit": "jest --config test/unit/jest.conf.js"
Remove the --coverage flag. It can be nice to have, but for now can remove it. One last thing: we will use the official Vue testing library, vue-test-utils. Install it with yarn add @vue/test-utils --dev.
Let’s write a quick tests for Create.vue, the component we just created. In src/views/posts/Create.test.js, write the following test:
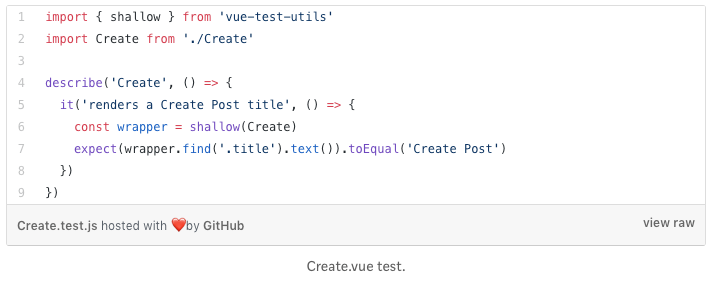
To run the test, type yarn unit --runTestsByPath src/views/posts/Create.test.js. This test should fail — which makes sense. We are trying to find a <div> with the class title, and expecting it to contain the next “Create Post”. The Create component does not do that yet.
Make the test pass like so:
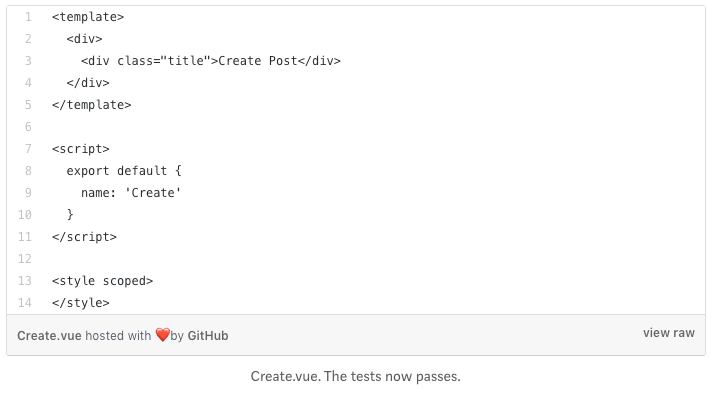
The test now passes! Check by running the yarn unit command above.
Adding the Create route
To keep all the components together, I am going to create a posts directory in the components folder by running: mkdir src/components/posts.
First, let’s add the new view in router/index.js.
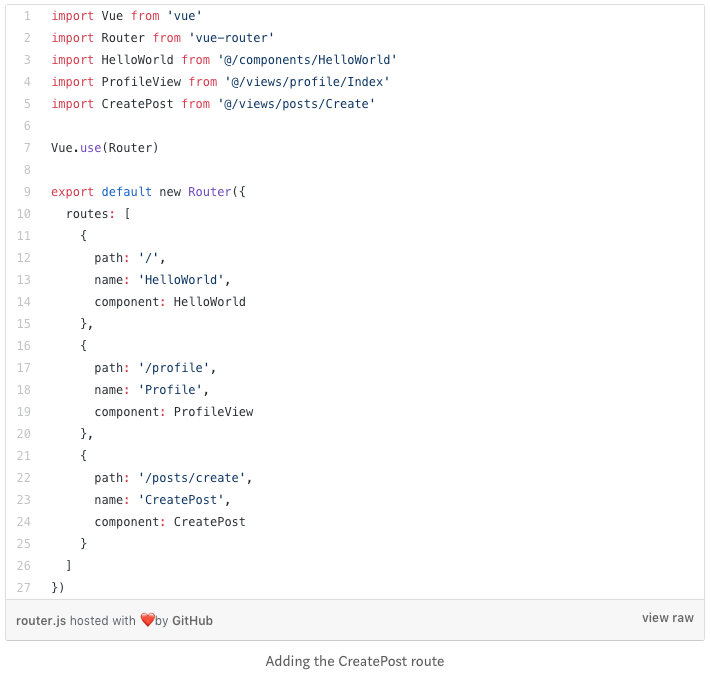
To see if this works, start up a server by running yarn dev and visit localhost:8080/#/posts/create . You should see the words “Create Post” render.
Let’s jump in and get something working quickly, then improve it incrementally. The next milestone will be:
- Allow the user to enter some text
- Click a button
- Post the content to the Steem blockchain
Creating the Post component
Let’s start with the first point above: get the user’s input. We will need a new component. I think I am going to make this into a social media platform link Instagram, so users will post an image accompanied by a description, and several tags (up to four).
The Steem blockchain only supports around 1mb per post, so saving images there is not realistic — we will host them elsewhere, and just save the URL to the post. That will come later, for now we will just focus on the image description.
Go ahead and create a CreateDescription component:
vc src/components/posts/CreateDescription -t
We want this component to work using v-model, so we can write the final markup in CreatePostContainer like this:
<template>
  <CreatePostLayout>
    <CreateDescription v-model="description" />
    <CreateImage />
    <CreateTags v-model="tags" />
    <SubmitButton />
  </CreatePostLayout>
</template>
<script>
/**
 * Business logic here
 */
</script>
This follows the container-layout-component architecture — the CreatePostContainer will handle the business logic, like communicating with the Steem blockchain, and the inner components such as CreateDescription and CreateTags will be presentation components, simply displaying and receiving user input. CreatePostLayout will handle how the form components are displayed, such as handling different screen sizes.
Here is CreateDescription.vue. An explanation follows:
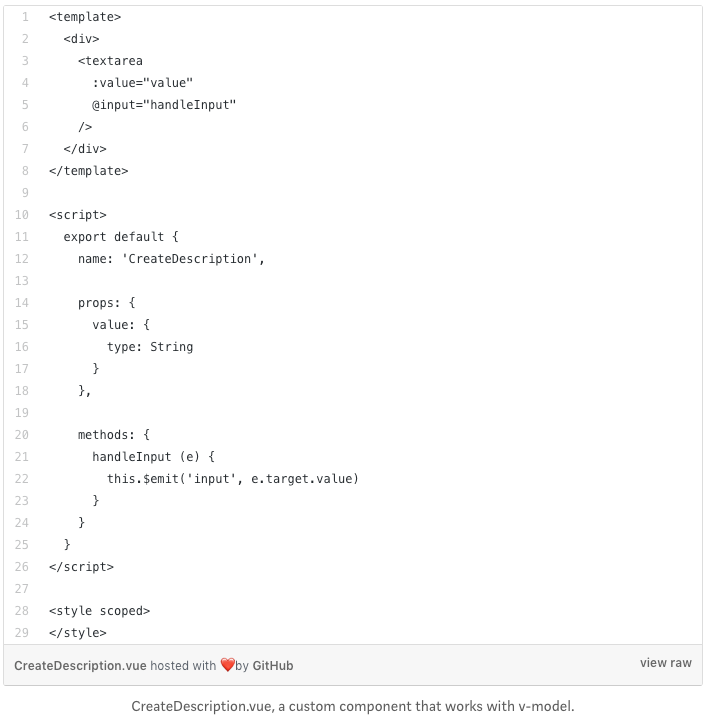
If you want a custom component to work with v-model, all you need to do is:
- accept a value prop
- emit a input event
You can learn more in the official documentation about using v-model with custom components. Let’s write a quick test to make sure this works:
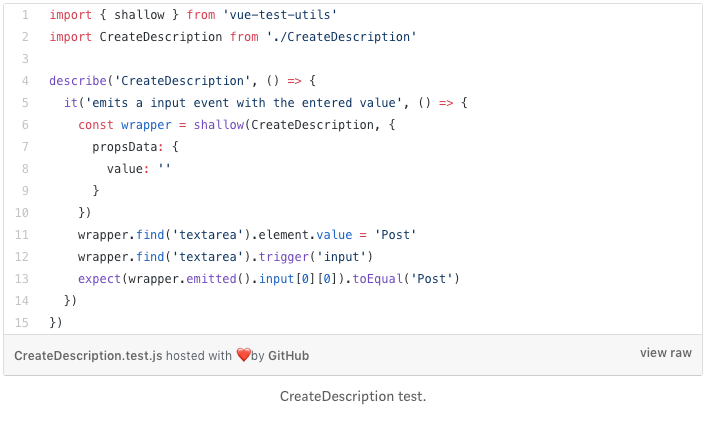
Here’s the breakdown:
- lines 6–10 render the component and pass a value prop. Nothing new.
- line 11 sets the textarea value to ‘Post’.
We need to trigger the input event manually in the test emitted returns all events emitted from the component. We want the input event, specifically at the 0’s index. We could potentially emit the same even many times, that’s why it returns an array.
The first argument for the input event is event.target.value, in this case the text we entered. It should match ‘Post’.
Run this with yarn unit --runTestsByPath src/components/posts/CreateDescription.test.js. It should pass. Try changing the expectation to something else, like ‘Postt’, and run the test again to see the output for a failing test.
Creating CreatePostContainer and CreatePostLayout components
Before going any further, let’s get our new component rendering on the screen. To do so, we need two more components — CreatePostContainer, and CreatePostLayout. This is a convention I used in a recent project, to great success. CreatePostContainer will hold all the data and methods. CreatePostLayout will apply styling and to the component.
CreatePostContainer will look something like this: (note, not the actual implementation!)
<template>
  <CreatePostLayout>
    <CreateDescription
      slot="description"
      v-model="description"
    />
  </CreatePostLayout>
</template>
The interesting part here is the use of slot. You can learn more about slots in Vue here in the official documentation. Basically, it allows us to easily distribute content within a component. This way, CreatePostLayout, as the name suggests, can control the layout of the children — how large, small, their color, etc.
The advantage of this is we don’t have to hardcode things like the width and height of the child, and we can use it in other part of our app. We can allow the child components, things like <button> , <textarea> etc to expand to whatever size their parent layout set them to. The components will be more reusable.
The <CreatePostLayout> component will look something like this: (again, not actual implementation!)
<template style="width: 500px">
  <form>
    <div style="border: 1px solid black">
      <slot name="description" />
    </div>
  </form>
</template>
We can control the width, height and so on by wrapping the <slot>, in this case the CreateDescription component, in a
Create the two components:
vc src/components/posts/CreatePostContainer -t
vc src/components/posts/CreatePostLayout -t
Here are the implementations for the two components we just talked about:
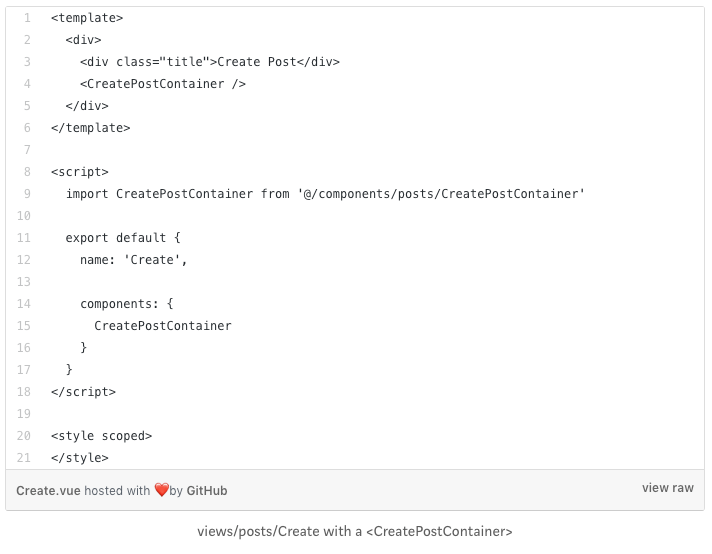
CreatePostContainer
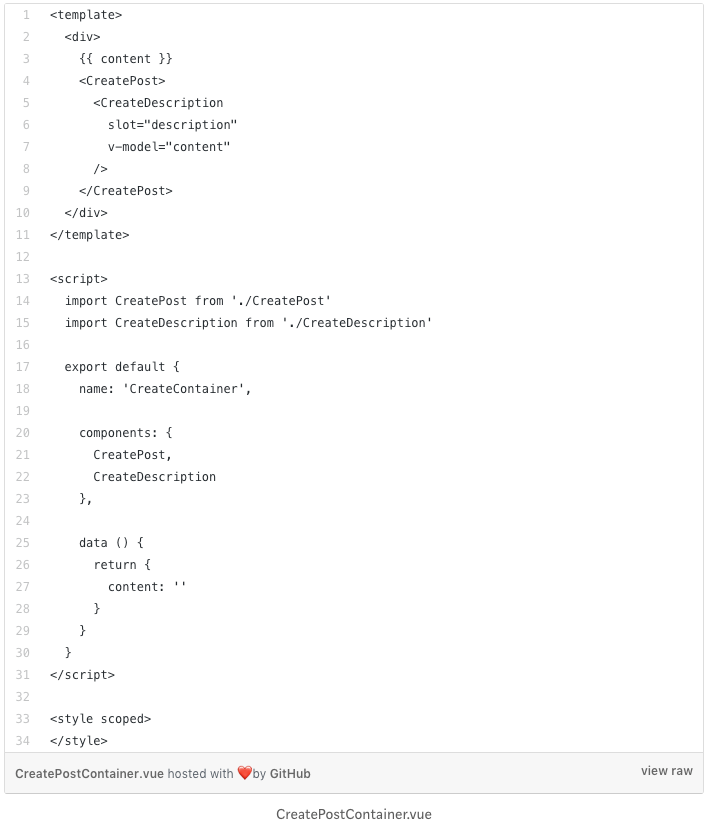
Note line 3 — {{ content }}. This is just for a quick test, as you will see.
CreatePostLayout
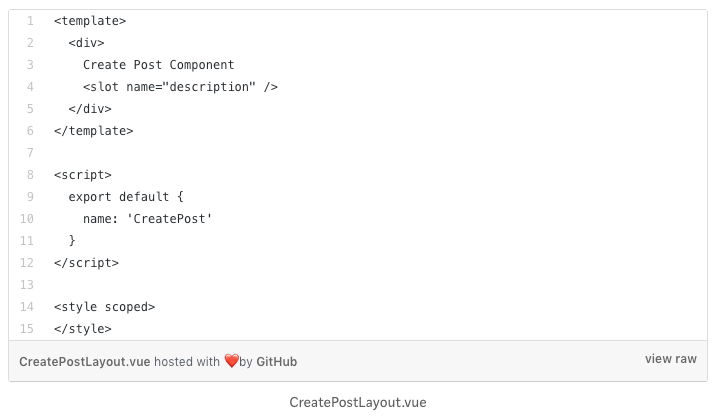
Now we just need to put CreatePostContainer into the the view. Update src/views/posts/Create.vue:
Visiting localhost:8080/#/posts/create should show:
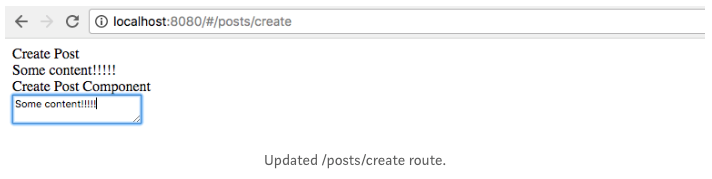
Note I entered some text into the textarea to see if everything was working — looks good. You can now remove {{ content }} from CreatePostContainer.vue on line 3.
Adding a SubmitButton component
All we need now is some way to submit the text, and to broadcast the post to the Steem blockchain. Since we want to reuse the button we are about to create, make a new directory called shared:
mkdir src/components/shared
And inside, a button: vc src/components/shared/SubmitButton -t. We want to make sure the user only submits once, so we want to set the button’s disabled attribute to true when submitted, and change the class (and thus styling) to let the user know they clicked it. Let’s start with a test to help us flesh out what the button needs to do:
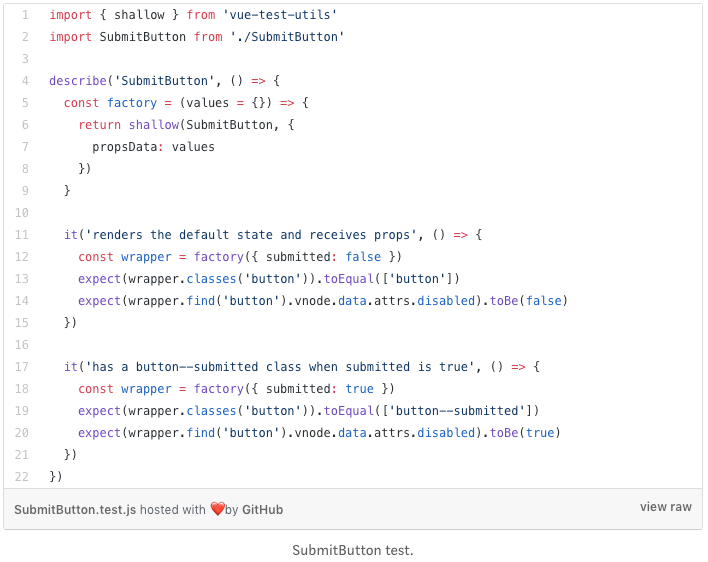
Pretty simple — all the button does is a receive some a submitted prop and set a class and disabled property based on that. The button’s disabled attribute ensures the user cannot accidentally submit the form twice.
We use a factory function so we don’t have to constantly duplicate the shallow render logic. You can read more about factory functions in unit tests here.
Adding the SubmitButton to the form
Now we have a button, let’s update CreatePostContainer and CreatePostLayout.
Let’s start with CreatePostLayout.vue. We want a form containing the textfield, CreateDescription, and a button to let us submit, which will be SubmitButton. Lastly, we should emit a submit event when the form is submitted.
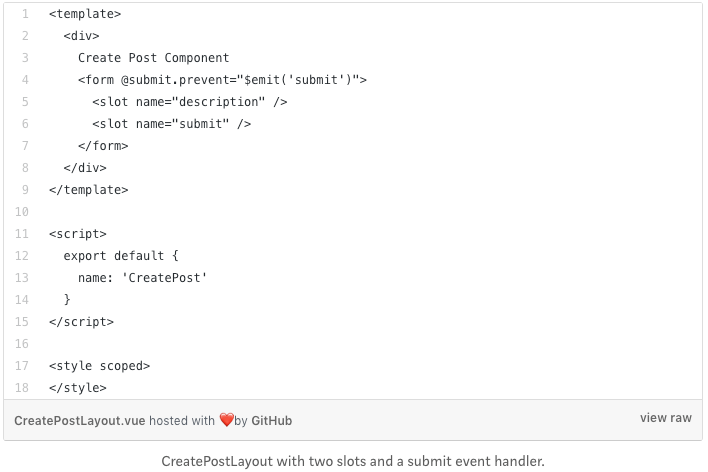
Because we set type='submit' inside of SubmitButton, and it is nested inside of a , the form will call a submit event when SubmitButton is clicked. This is not unique to Vue, but just regular HTML forms.
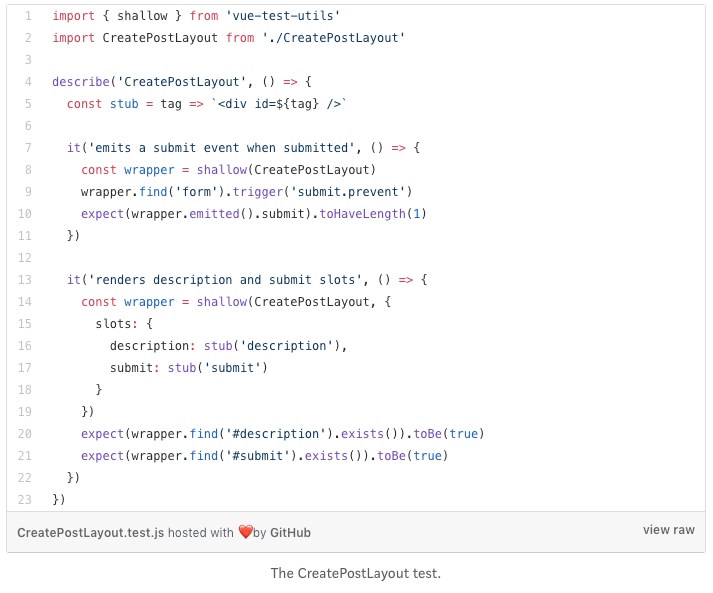
Let’s write a test for this. We want to check that the
- submit event is emitted
- the two
<slot>components are rendered
We have covered event testing already. More information about slots and vue-test-utils is here. The test is pretty straightforward. Notice the neat stub helper function on line 5, which saves us some duplication when creating the slots.
CreatePostContainer.vue is pretty simple as well. Here it is:
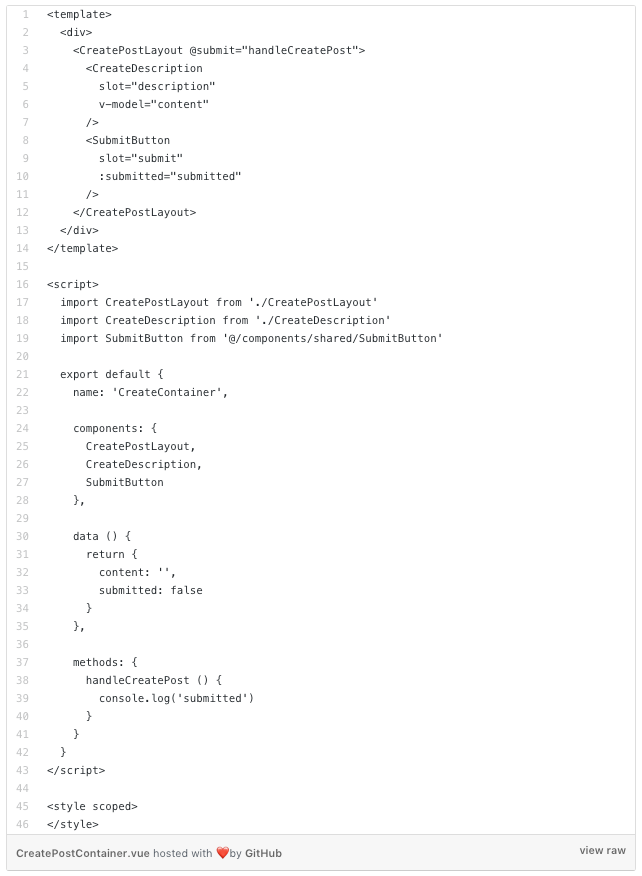
And of course, a test. We just want to make sure <CreatePostLayout> is rendered. When we fill out the logic for handleCreatePost, we will update the test.
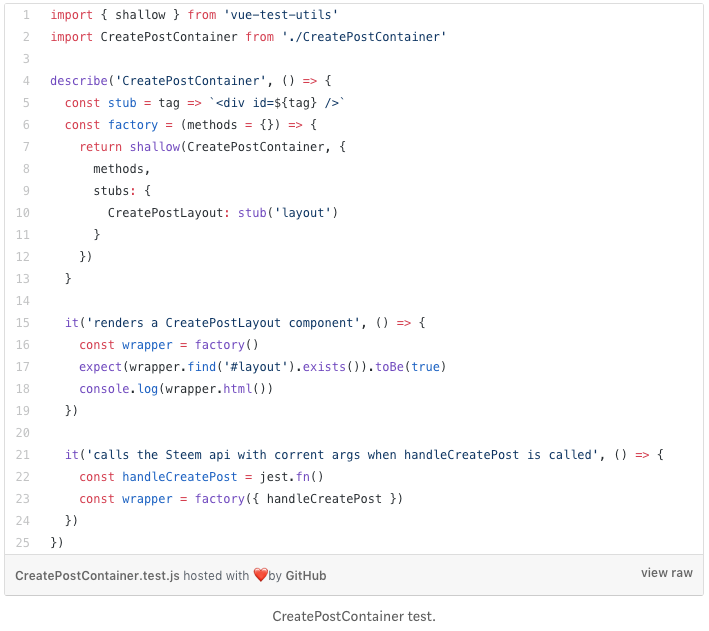
It would be nice to also test that the CreateDescription and SubmitButton were correctly rendered, but I am not sure how to do this, or even if you can with vue-test-utils at the moment. If a reader knows how, please tell me!
If everything when well, visit localhost:8080/#/posts/create and you should see the following:
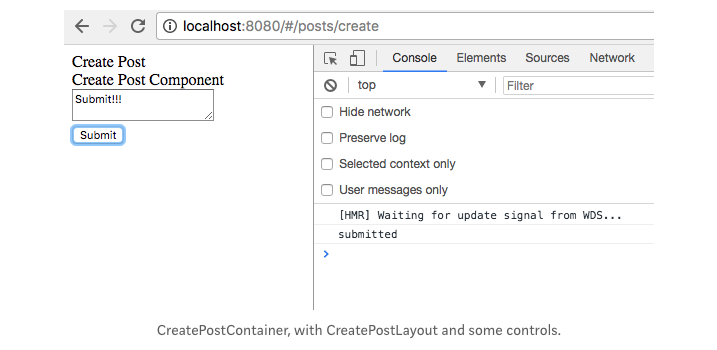
Clicking submit should print submitted to the console.
##Integrating Steem.js to broadcast a post
Now the exciting part, posting to Steem. This is getting pretty long, so we will just get posting working by hardcoding a private key. The next article will start setting up a proper authentication system.
Steem uses public/private key encryption. To make a post, you will need your own private key. There are several permission levels, which you can read more about here. A future post will go more in depth on this topic.
steem.broadcast.comment(
  wif, // your posting private key
  parentAuthor, // main tag for the post
  parentPermlink, // this is used for replies, blank ok for now
  author, // your username
  permlink, // what you want the permlink to be
  title,
  body,
  jsonMetadata, // extra data. We will use for more tags.
  function(err, result) {
    console.log(err, result);
});
This comes from the Steem.js documentation. I added comments to explain what each argument does. I had to trawl Github issues and try things out since the documentation is pretty sparse at times. Hopefully this article makes it easier for you.
Under your profile, go to “wallet” and the “permissions” tab. Mine looks like this:

These are my public keys, so it’s okay to post it publicly. You want the “posting” private key = click on “show private key” and it should toggle. Grab that and save it in a variable in your handleCreatePost method. DO NOT COMMIT THIS TO GITHUB! Keep you key secret. Hardcoding is it a VERY bad idea, we are just doing it to demonstrate, future articles will deal with this in a more secure manner.
Update CreatePostContainer.vue. We need to import steem.js, set the url to make requests to, and add the logic to handleCreatePost.

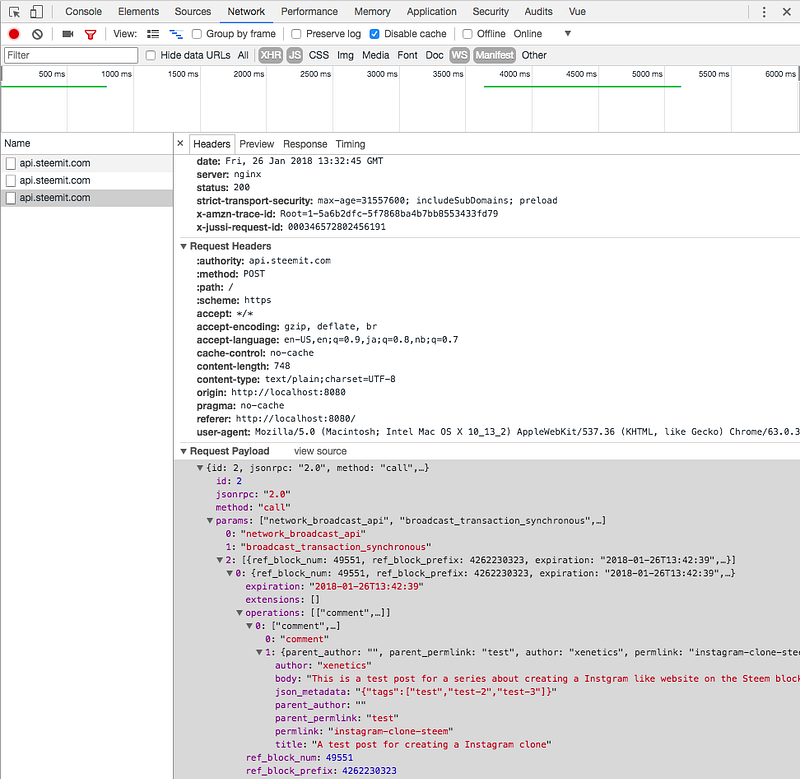
And let’s give it a try! Clicking submit show three requests in the “Network” tab of Chrome’s devtools. The last contains the post. I’m not sure what the others are for yet, one looks like it gets the previous block, and one the next block? Maybe to know where to save the post? I’ll try and find out more.
We also get a nice console.log if everything went well:

And sure enough, checking steemit.com, a popular web client for the Steem blockchain:
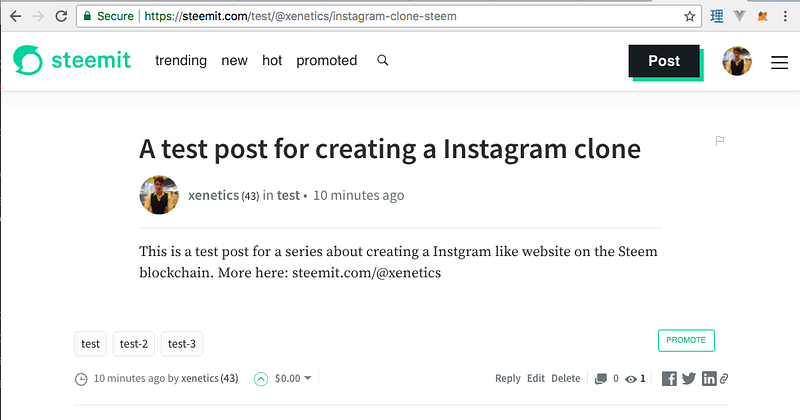
Notice the permalink, “instagram-clone-steem” in the URL. These are important for SEO.
You can look up your post using the response values like block and transaction number, but I haven’t found a good web interface to do so. You can do it using Steem.js pretty easily. This will be covered in a future article when we build a activity feed.
That’s it! The result is simple, but you know it’s powered by one badass stack, complete with loosely coupled components, a Storybook and unit tests.
Styling and Storybook
This is left as an exercise! Decide how you want your social media platform to look. I’d love to see what people come up with!
Refer to the previous article in this series for how to add stories to storybook, and add some styling to the components we created. Since we are using the container/layout/component architecture, doing so it a breeze. Here is how mine looks — I like simple designs.
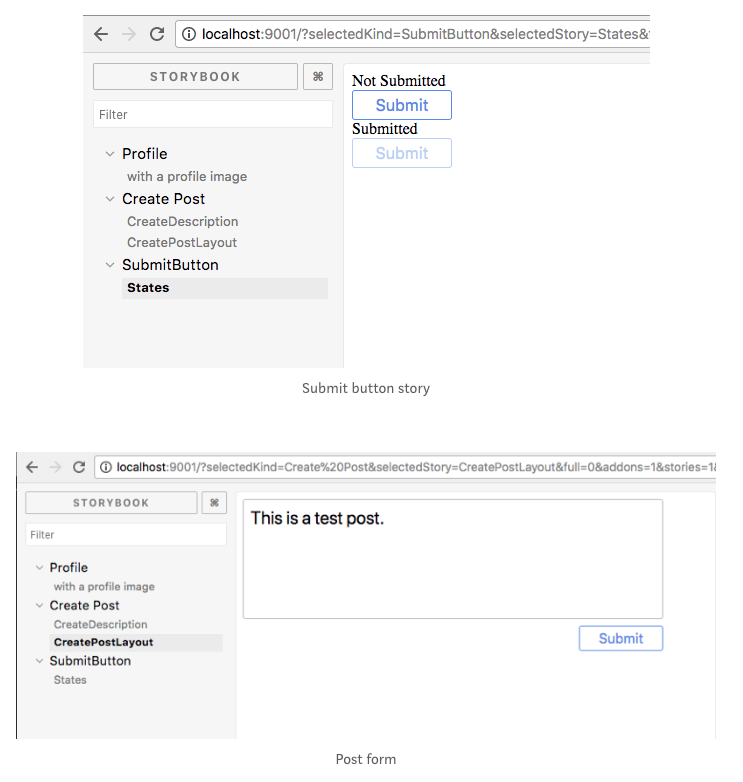
I am not a designer, so you can probably do better. You can see the full source code for this article is here.
Thanks for following along so far! Please leave any feedback or corrections in the comments.
Posted on Utopian.io - Rewarding Open Source Contributors
Hey @xenetics I am @utopian-io. I have just upvoted you!
Achievements
Suggestions
Get Noticed!
Community-Driven Witness!
I am the first and only Steem Community-Driven Witness. Participate on Discord. Lets GROW TOGETHER!
Up-vote this comment to grow my power and help Open Source contributions like this one. Want to chat? Join me on Discord https://discord.gg/Pc8HG9x
Thanks!
Thank you for the contribution. It has been approved.
I recommend that for your next tutorial you create code snippets for your code (instead of images) and add a curriculum to the end of your post (even if part 1 got rejected).
You can contact us on Discord.
[utopian-moderator]
Thanks. Getting line numbers with code snippets is quite difficult, unfortunately :/
I'll look into the curriculum.
Great tutorial, Thank you!!! I used this info for building my react app!