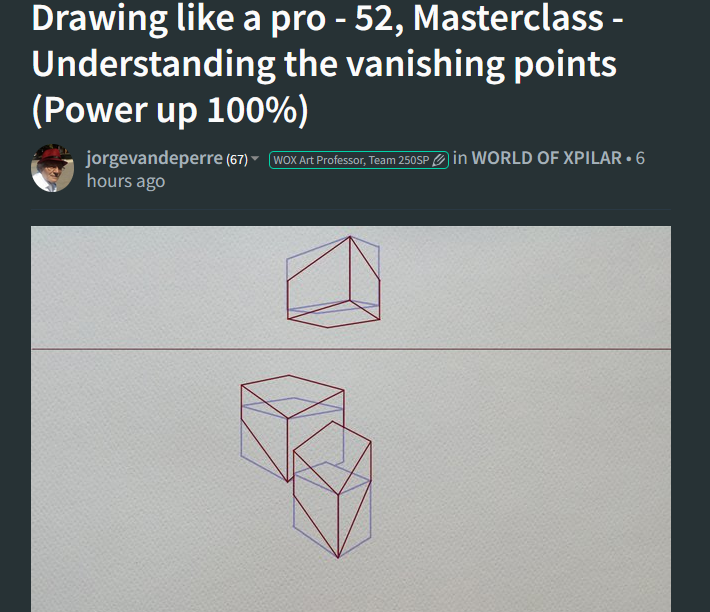
Drawing like a pro - 52 Understanding the vanishing points- lesson by @jorgevandeperre
Hello dear Steemians,
Today I wanted to draw your attention to the next lessons of @jorgevandeperre, who kindly giving us the introduction into the wonderful world of Drawing with explanation how to do it correctly and gain the basic knowledge, foundation for our future works.
Luckily I had enough time today, therefore, immediately decided to do it and managed to capture majority of my work.
I hope everyone who is interested in drawing will take part in the lessons that is running by Jorge.

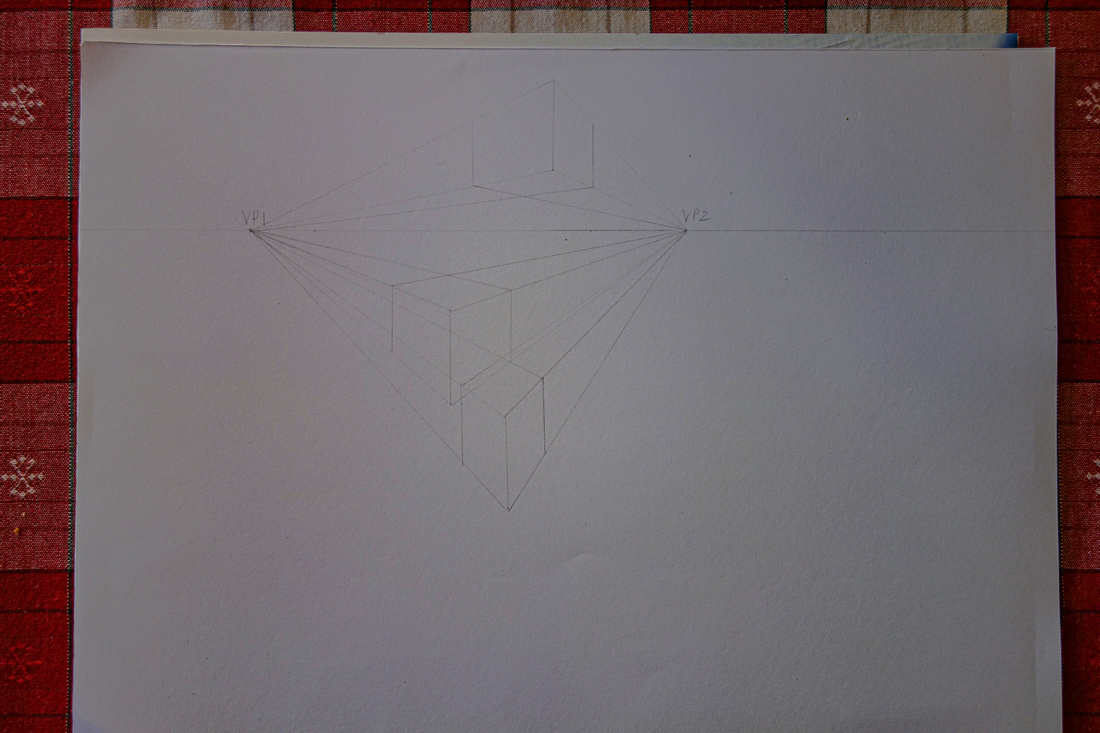
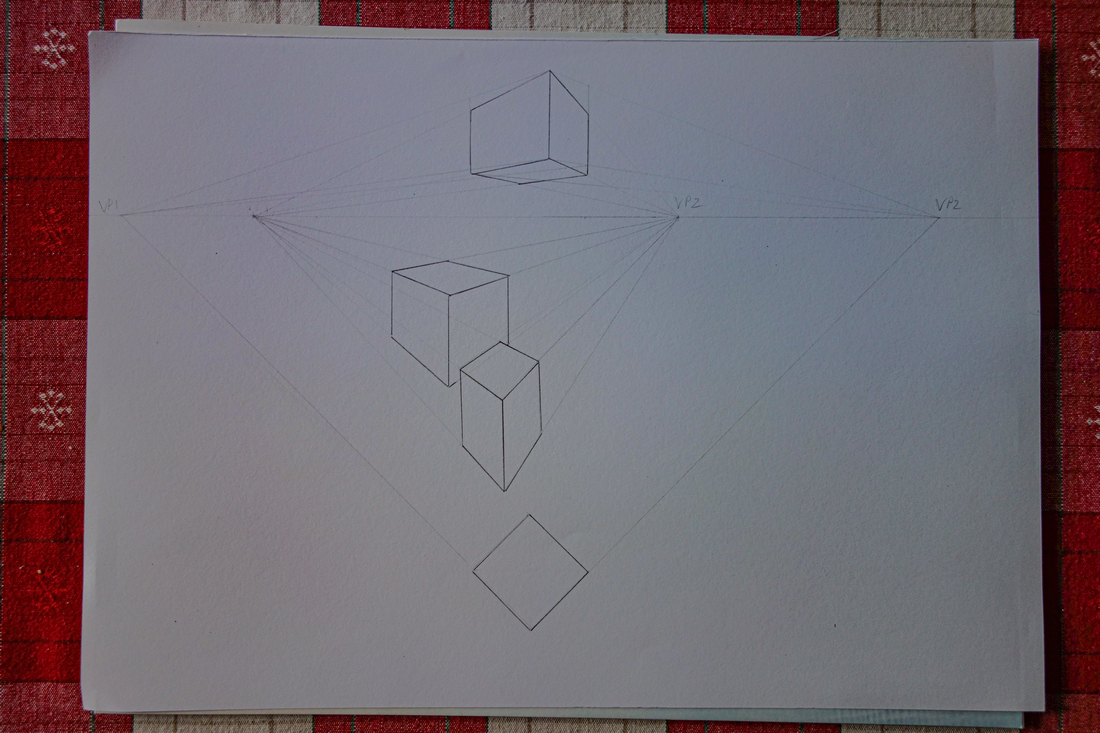
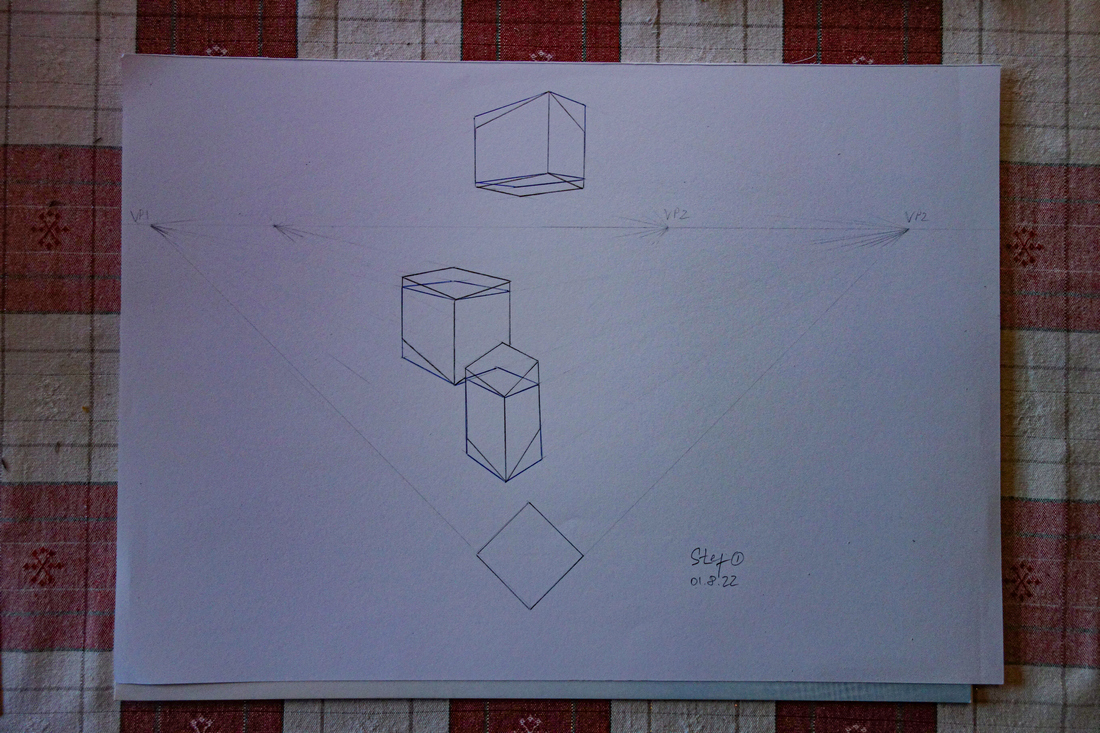
Here are the ready cubes, I decided to use 3B pencil to make the cubes more prominent.
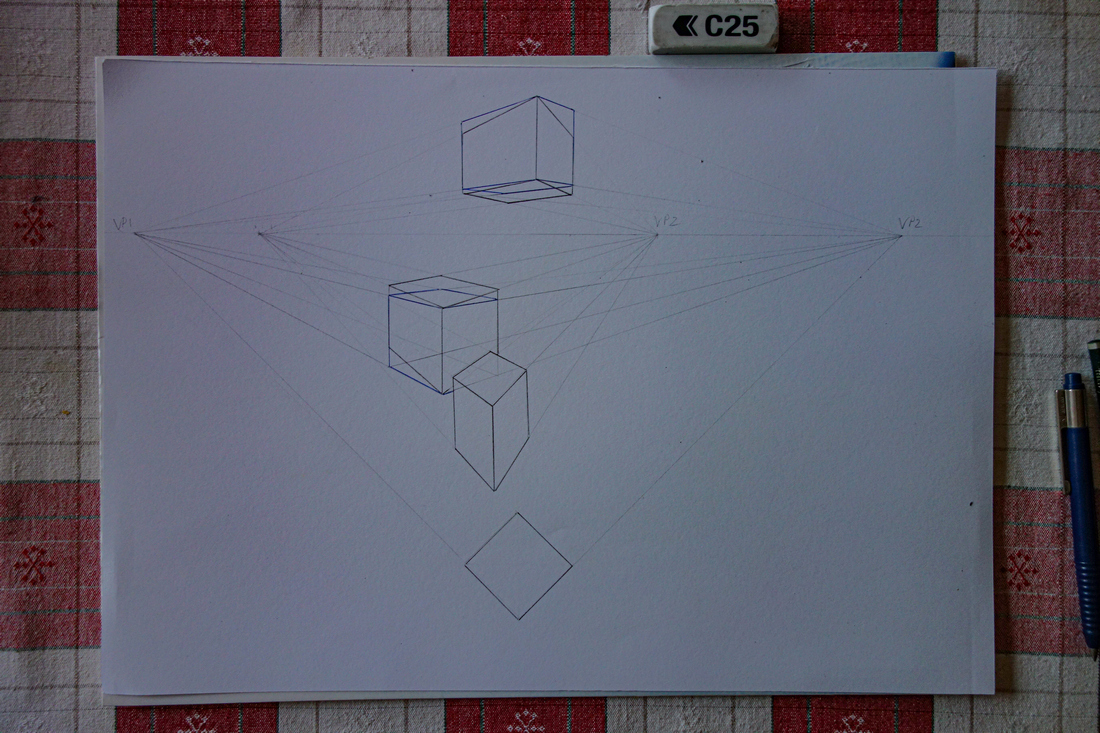
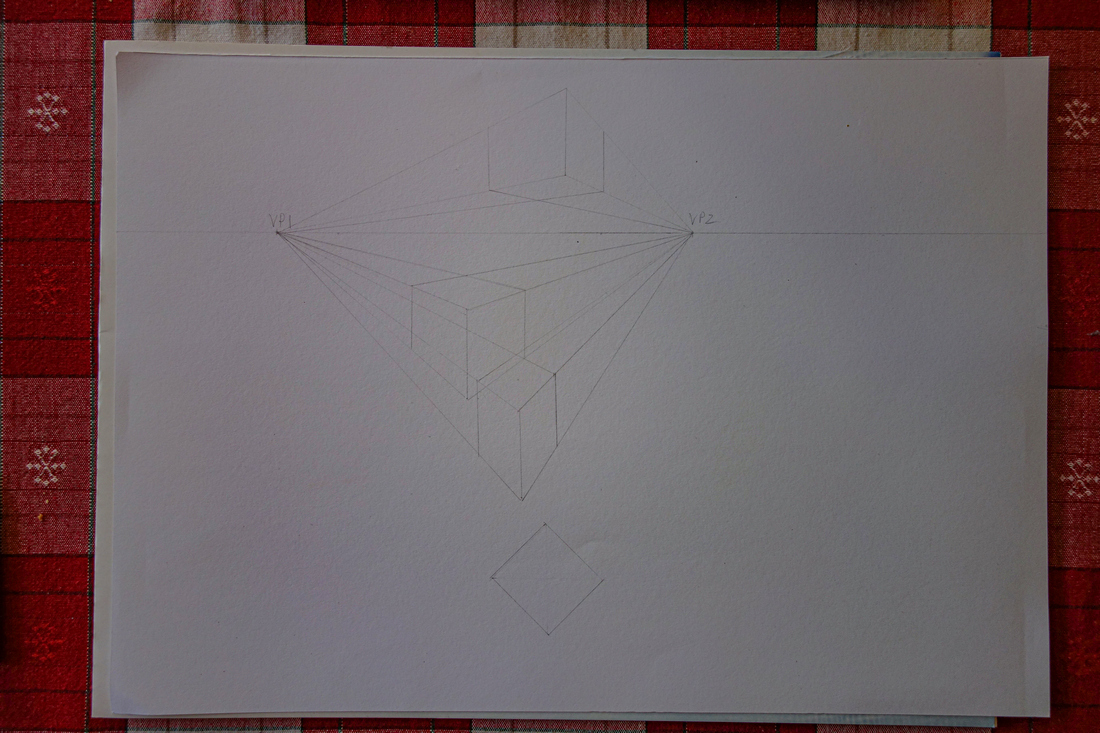
Here are I decided to use the blue pen, so that the cubes that are drawn using the VP of the lowest cube with 90 Degree angle, so that they are differ from each other
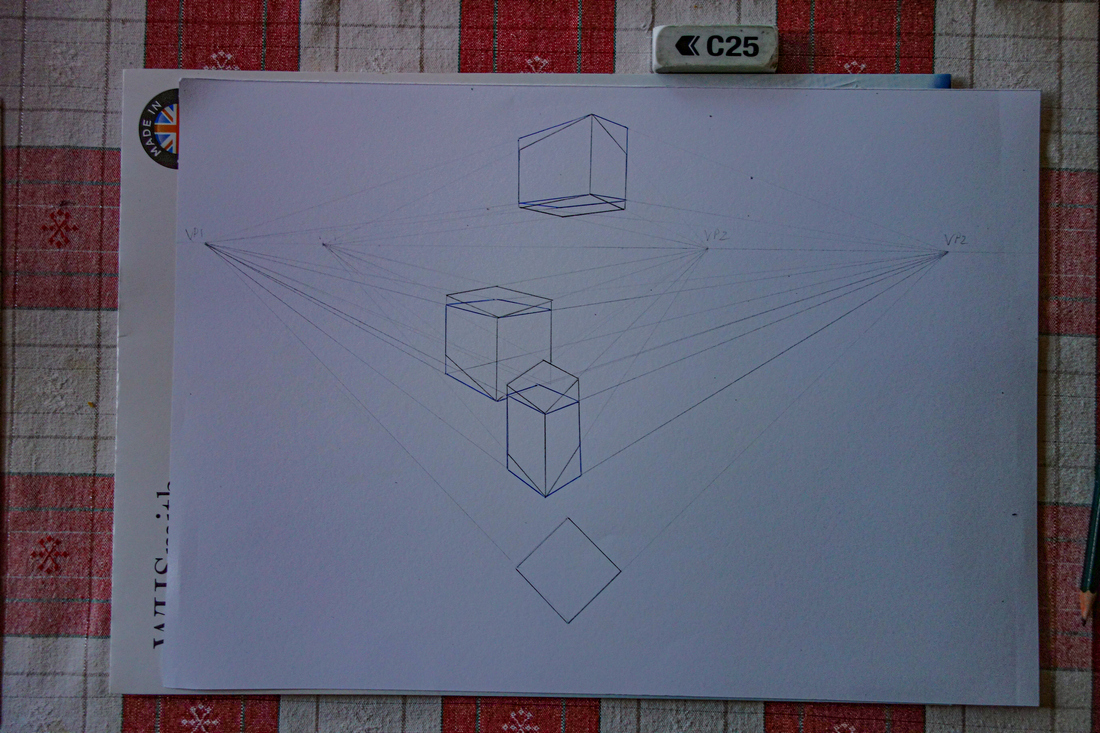
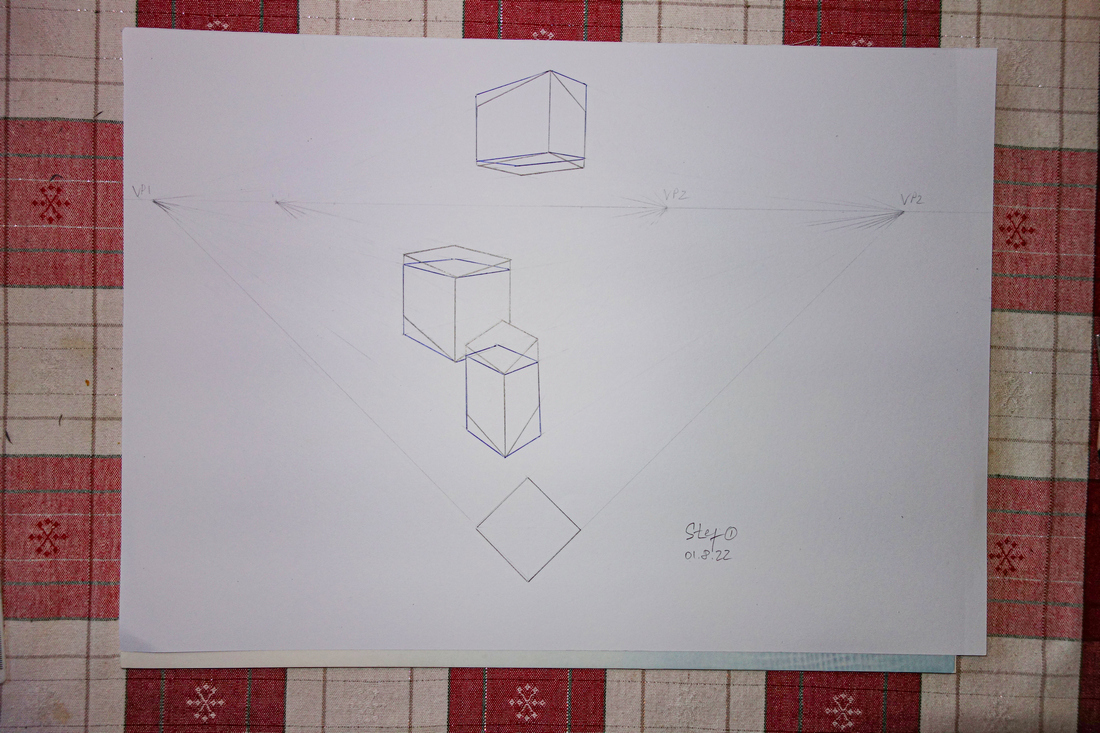
Here I have deleted many helplines and also used the flash, to give more light to the drawing.
Thank you for viewing and please join our classes.


Upvoted! Thank you for supporting witness @jswit.

Hi Stef! Nice drawing as always but I would like to know what sense this final drawing has for you.

Then I would like to ask you to read the explanations in my post again and tell me if there is anything that is not clear or difficult to understand so I can try to improve it.
Regards!
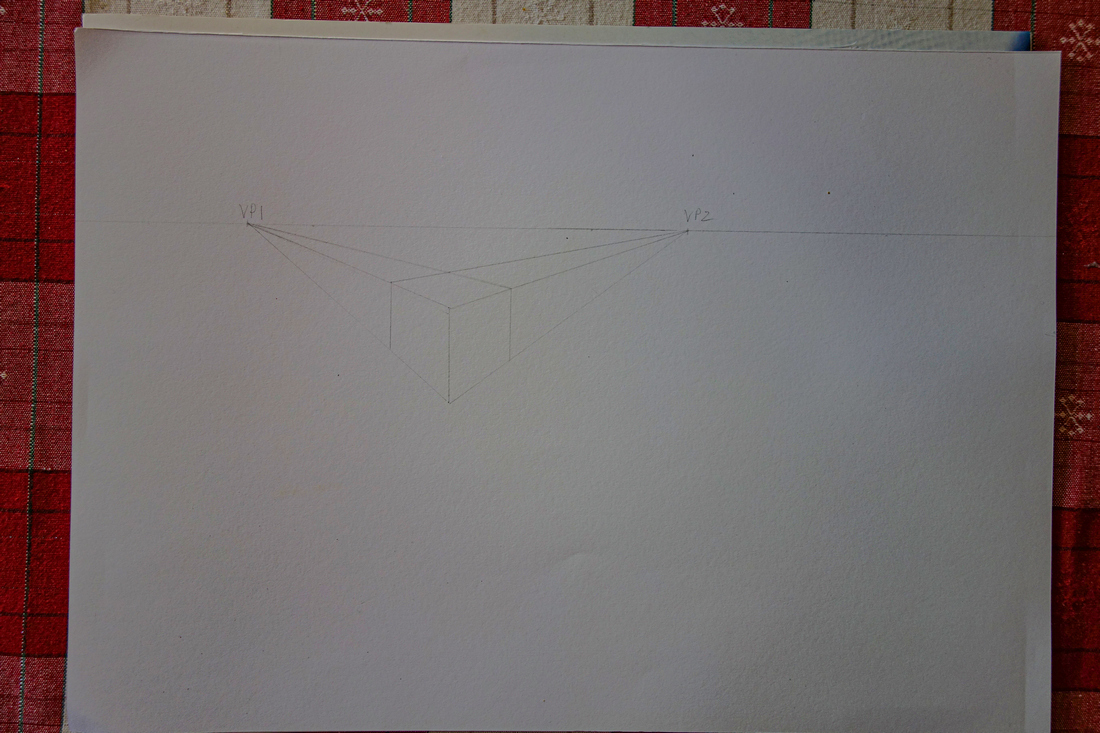
Hi Jorge, when I started to draw the first cubes I had my vertical edge of the cubes as a center of my drawing and each cubes. Of course, the length of the sides maybe not equal but I did not think about that for me it was a square shape that I concentrated on more.
Using vanishing points located close to objects it made the cubes look deformed but on other hand it was gave me an impression being there and looking at cubes from the lower corner/ middle or from above. That also reminded me some photogrpahs of architecture when we do and stand in front of the building, sometimes too close and see how the objects are "running up to the sky and becoming more narrow on the top.
The square on the bottom, due to 90 Degree, I can't see that edge that I drew in other cubes because it goes directly down and angles of upper and lower surfaces match.
In this drawing we used that 90 Degree in order to create two new vanishing points and also we draw new cubes using them.
When I looked now at the last drawing I saw three points two on horizon and one was the corner of the square. It is looking like we have three points on drawing now. Is that what you were queering?
From the description in your post, it was quite clear for me what you are talking about, at least for me it sounds quite clear.
Thank you for the opportunity to discuss the drawing and would be glad to hear if anything was wrong that I did.
Hi Stef, there's nothing wrong with your drawing, it's perfectly done in its technical aspects, but I was surprised to see an overly mechanical copy of my samples. I expected to see your own interpretation following the rules you already know.
The goal of this lesson was to make you aware of why some perspectives look distorted and to enable you to see where the problem is and how to fix it.
To do this, I have divided this lesson into three parts:
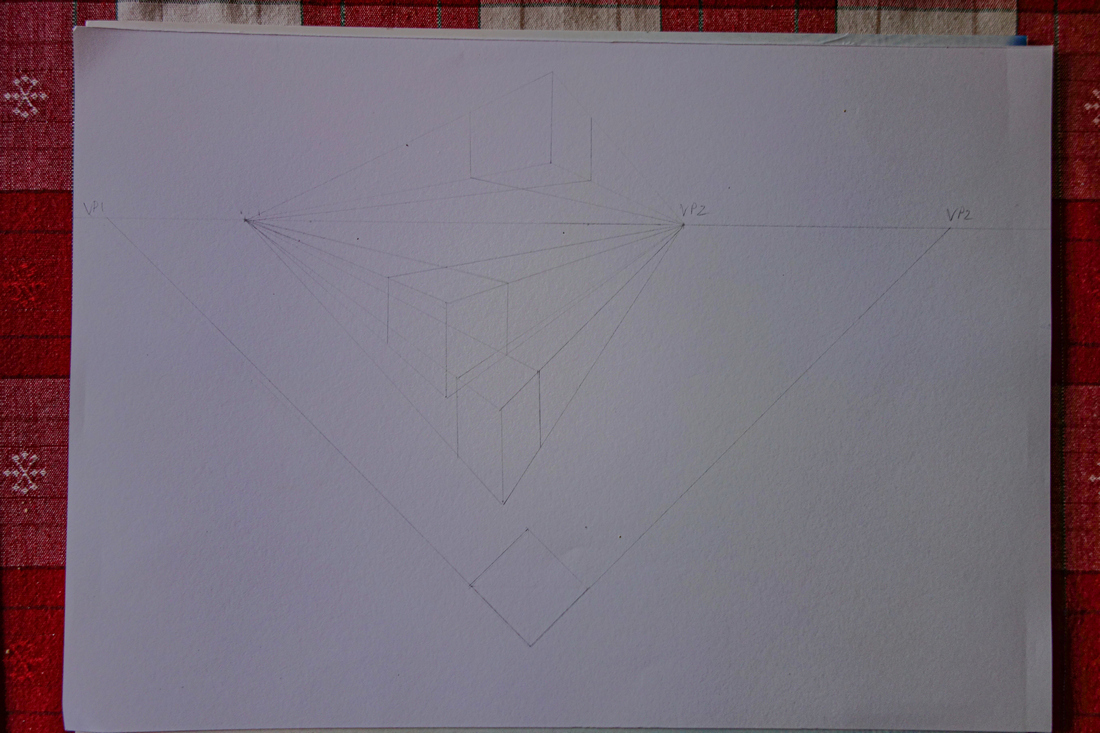
The first is to show a wrong perspective. For that, I drew three cubes to show the result of using vanishing points very close to each other. This was an example of what NOT TO DO.
In the second part, I show you a way to define the distance of the vanishing points to avoid this mistake, this is by using an imaginary projection of the top view of a cube located at the bottom of the page.
In the third part of this lesson, I invite you to make just the right drawing. I didn't go through the process step by step because I assume that if you are at this stage of the class you are already able to do the drawing by yourself.
Finally, I showed you an overlay of the two drawings ONLY aimed to you can appreciate the difference in results for the same cubes at identical positions, height, and depth.
I expected from you the development of the third part of the lesson.
I hope you will show me your artistic progress. Have you tried other situations? Other variations? I would like to observe your progress or your mistakes doing your own exercises.
PS: I visited the Pantheon today, it's fantastic!
I actually loved the distorted version because it is unusual and that is why decided to do the same to test if in my drawing the effect is the same. But I will definitely try to do the drawing using the explanation.
I have seen Pantheon on TV in documentary about Rome Empire, the history and modern pictures as documentary, but I can't imagine how it is when you are there. It might be one of the places that one should put in bucket list.
Nothing compared to the experience of being inside the building.